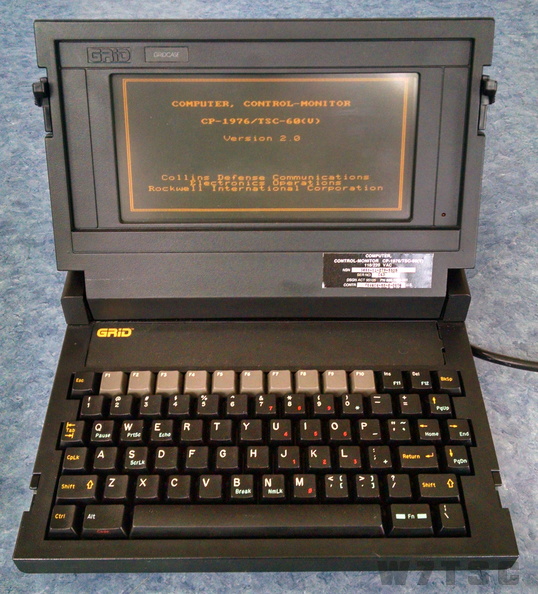
 The AN/TSC-60(V)9 facility is controlled by a military hardened and TEMPEST approved GRiD laptop computer. This computer uses a Read Only Memory (ROM) to operate, along with a single 720K 3½" floppy disk drive for configuration data. The program in the ROM consists of the GRiD Disk Operating System (DOS) and the radio control program. Any specific settings for the radios such as saved frequencies are saved on the floppy disk.
The operating system and control files are protected by being stored in the ROM, ensuring they can't be accidentally overwritten or destroyed. However, if the computer becomes inoperable, and the only copy of the program is on the ROM, then all radio operations via that control system are virtually of no use. The ROM might be transferred to another similar GRiD laptop; however, the easiest thing to do is pull the files so they can be used on a more modern computer.
Although the HF-80 radios can be controlled from their front panels, the overall TSC-60 Communications Central operating paradigm was to control the radios remotely after configuring the system with the appropriate signals and communications channels. Various data modems and FSK cards within the facility were designed to be patched into the radios and the radios controlled by the computer either locally or remotely once the mission configuration had been achieved.
The GRiD computer is not something that can easily be replaced today, therefore I felt it necessary as one of my first projects with the facility to extract the contents of the ROM and try to operate the radios remotely using a modern day computer with no 9-pin or 25-pin serial ports and potentially running a 64-bit operating system. This article will outline the steps necessary to extract the files from the ROM. Following this are three additional articles; one focusing on how to run the application from the hard drive on a modern computer, the next will show how to use a modern day USB port to drive the necessary serial output to a 25-pin connector and the last will focus on how to operate in a 64-bit operating system.
How do you get the ROM contents off a GRiD laptop?
I can't speak for all GRiD laptops though I am familiar with a handful and most should work the same. The ROM typically contains at a minimum, the operating system and potentially other files used to run specific programs. Since the operating system is usually GRiD DOS, a derivative of Microsoft DOS, the file structure should be familiar to those who understand DOS. This article will not delve into the details of a Disk Operating System (DOS) but will show how to get the files from the ROM onto the floppy drive in this case.
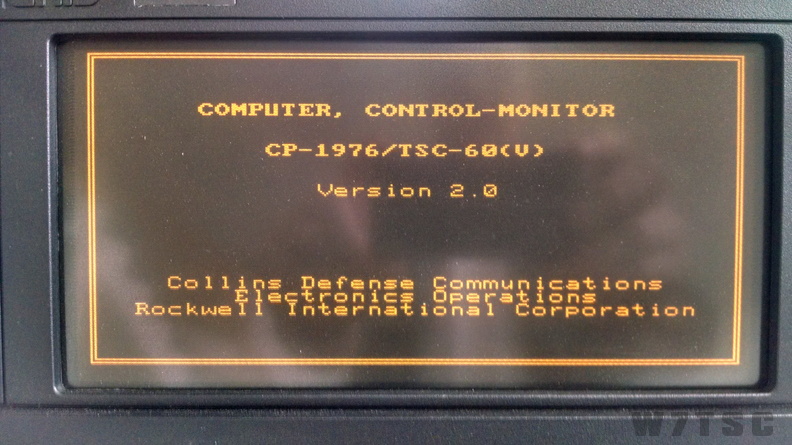
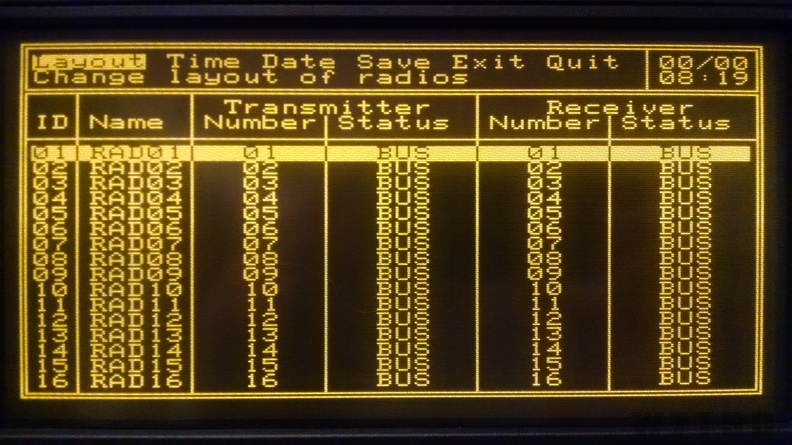
The AN/TSC-60(V)9 GRiD laptop boots directly into the ACM Executive radio control program (ACM) without any prompting and remains running until the laptop is switched off or reboot with [Ctrl]+[Alt]+[Del].
In order to get the files from the ROM, we need to do two things; prepare a floppy disk and drop the system to a DOS prompt. We start by firing up the laptop and creating a new formatted floppy disk via the Disk Operations Menu of the ACM.
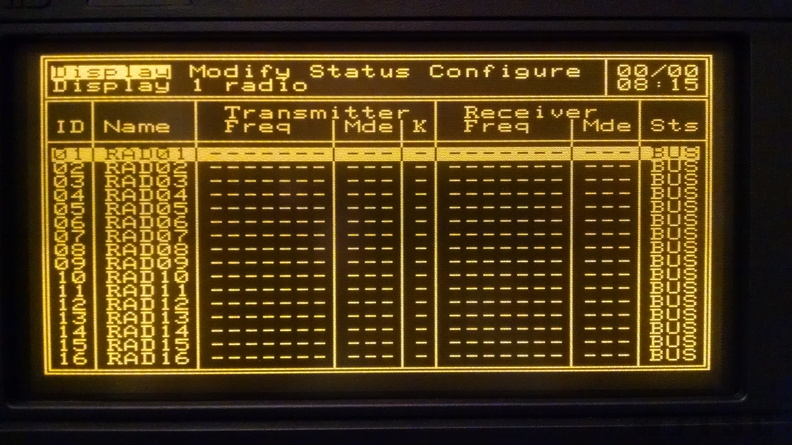
With no floppy in the disk drive, power attached to the laptop and no other peripherals, turn ON the GRiD. The ACM will begin and fail through the initialization and eventually show the default control screen. This is the default state of the radio control screen after the laptop has booted.
Our first objective to format a floppy disk requires the Disk Operations Manager which we get to be exiting the radio control portion of the ACM. Using the arrow keys move the highlighted menu item to the Configure menu item and press [Return].
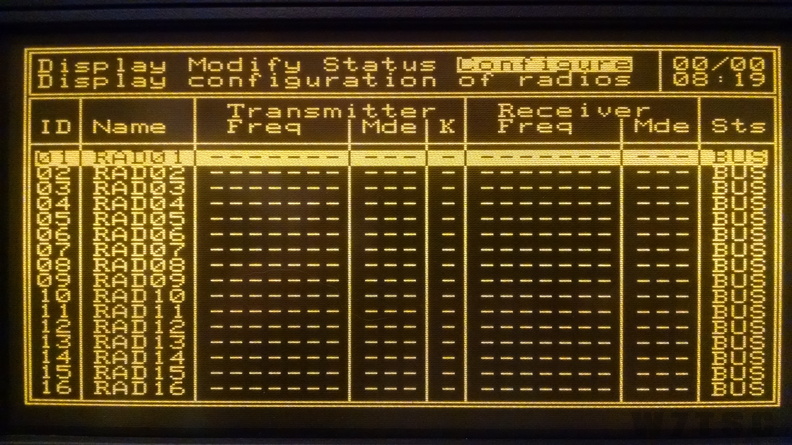
This takes you to the Configure screen.
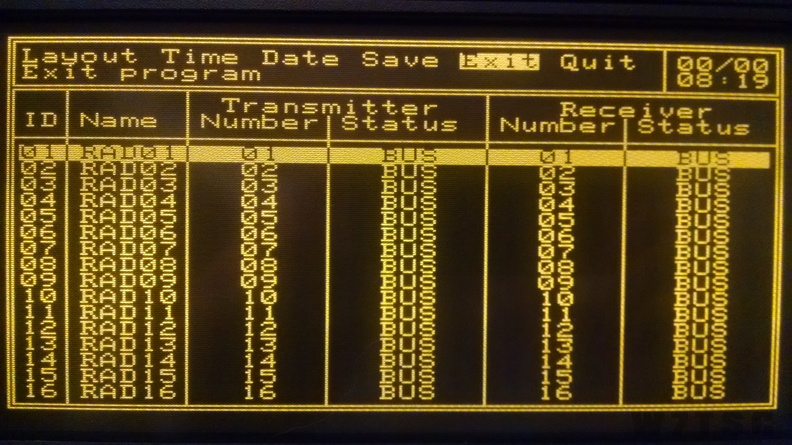
From the configure screen we want to select Exit to get out of the radio control. NOTE: there is an Exit and Quit option available to select. Quit is just like "escaping" to the previous page; therefore we want to Exit. Arrow over to Exit and press [Return].
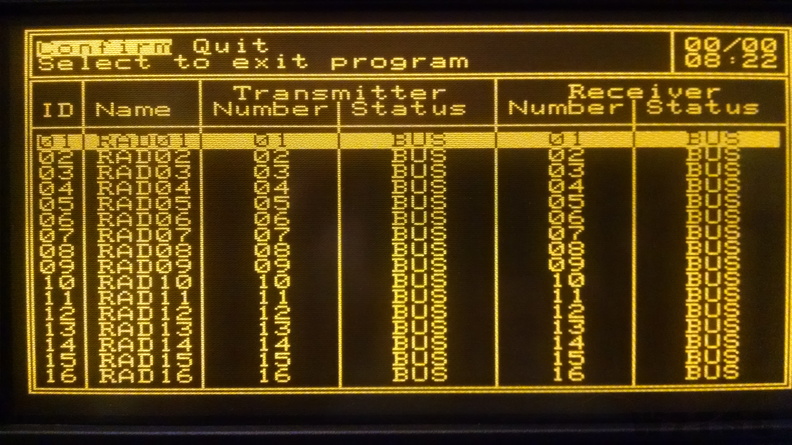
The next screen asks you to confirm you want to exit the program. The other option is to quit which takes you one screen back. Make sure Confirm is highlighted and press [Return].
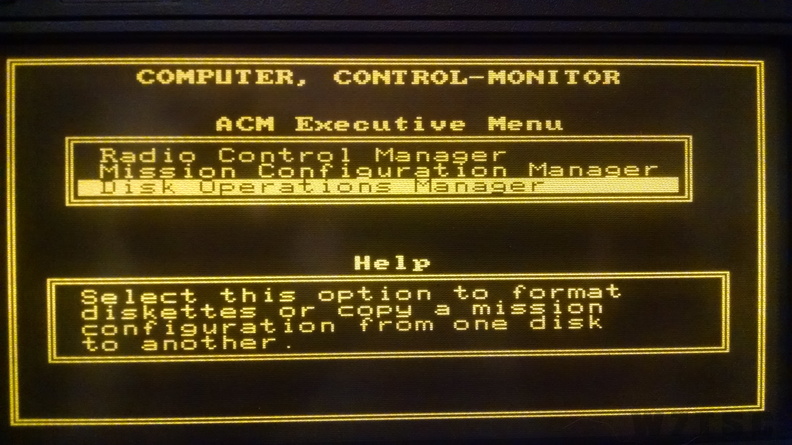
We are now at the default screen for the ACM Executive Menu which has options for starting the radio control program we just exited, configuring options for a specific mission (saved to floppy disk), and some disk tools under Disk Operations Manager.
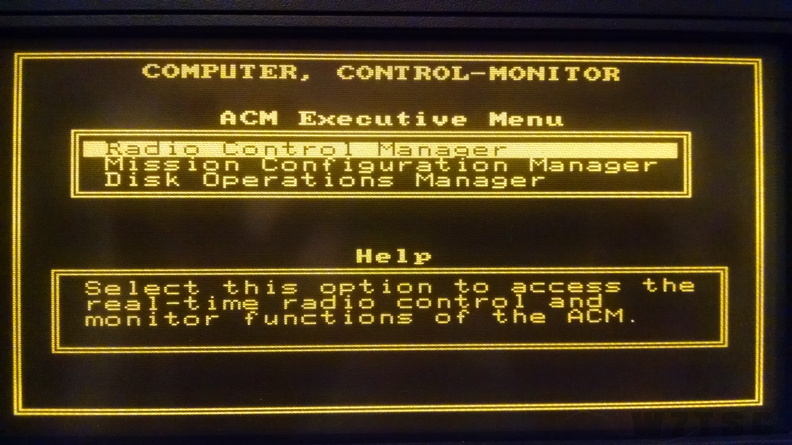
We want the Disk Operations Manager; arrow down to highlight that option and press [Return].
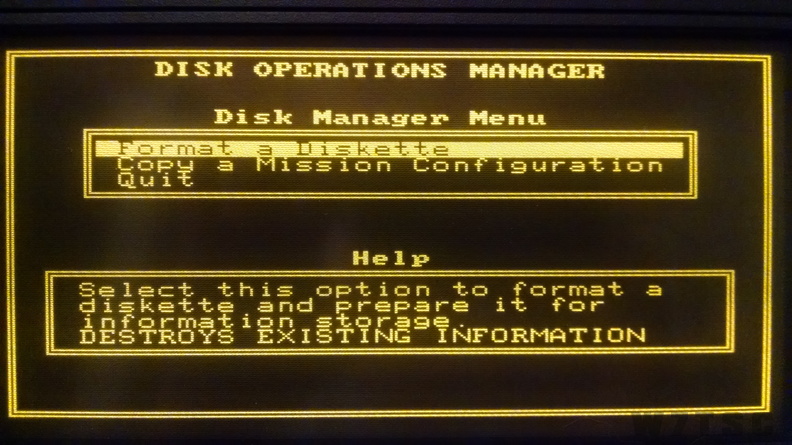
The disk operations manager has three selections; format a disk, copy a mission configuration or quit back to the prior menu. We wish to format a new floppy in order to copy the ROM files onto it. This will wipe and prepare the floppy. Make sure Format a Diskette is highlighted and press [Return] to continue.
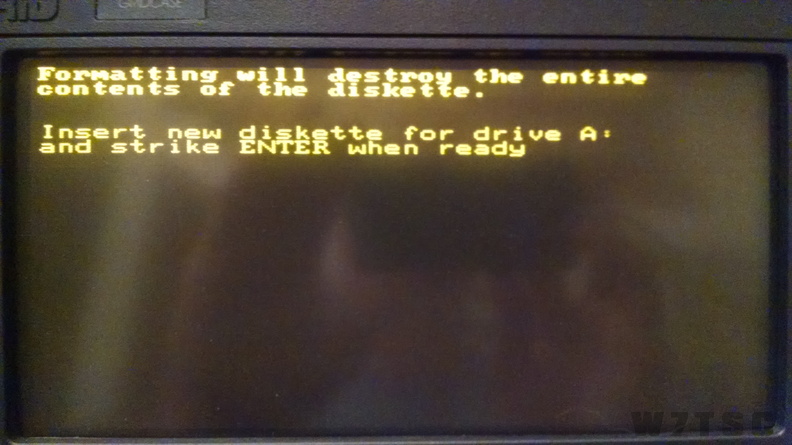
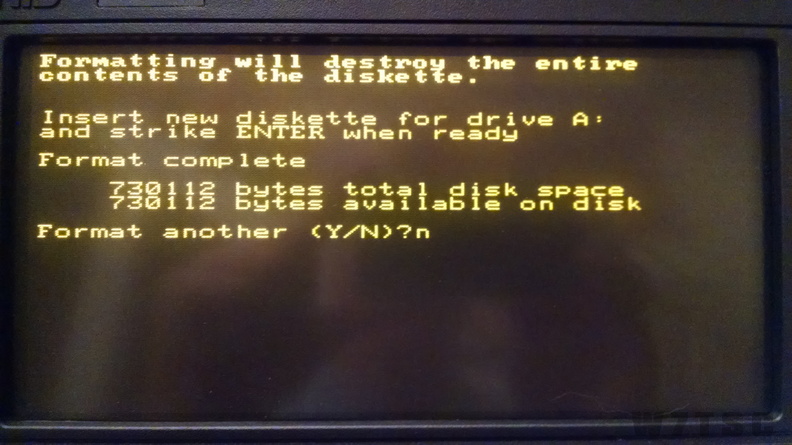
The GRiD used with the AN/TSC-60(V)9 facility uses a single 720K 3½" floppy diskette which has a single cutout and slide for write protection. Although you can use a 1.4M floppy, the system will still format it as a 720K; it does not recognize the additional cutout of the 1.4M floppy indicating it's capability to be formatted for more data. Insert a floppy disk and press [Return] to continue. The system will begin to format the disk.
Once the format is complete it will give a summary and ask if you want to format another.
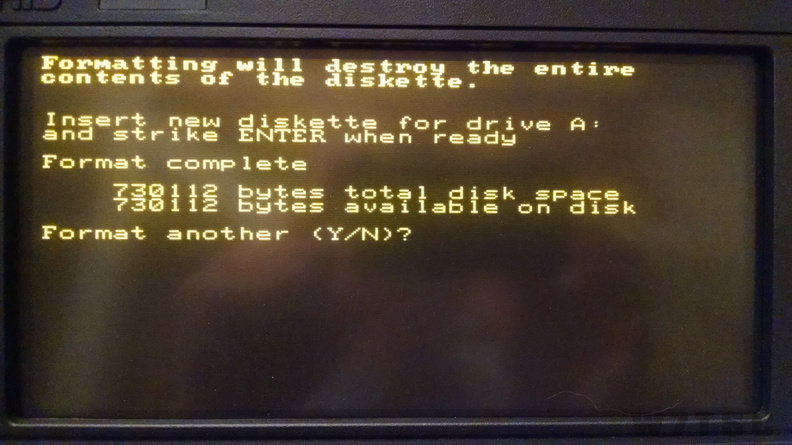
Type [n] followed by [Return] to exit the disk formatting program.
This will bring the screen back the Disk Operations Manager where selecting quit will go back to the ACM Executive Menu. At this point we can simply press [Ctrl]+[Alt]+[Del] to reboot the computer. Remember, because the operating system and ACM are in ROM, they can't be overwritten with bad data or stuck in an unknown state just because the system is reboot or shutdown without first shutting down the application or operating system.
When the laptop boots, the radio system automatically starts; this is done via an AUTOEXEC.BAT file located on the ROM that calls the ACMEXEC.EXE application. NOTE: The ACM radio control app does NOT have a way to escape or exit once running; the only way to exit is to reboot the computer. In order to get to a DOS prompt to copy files to the floppy, we must interrupt the autoexec batch process.
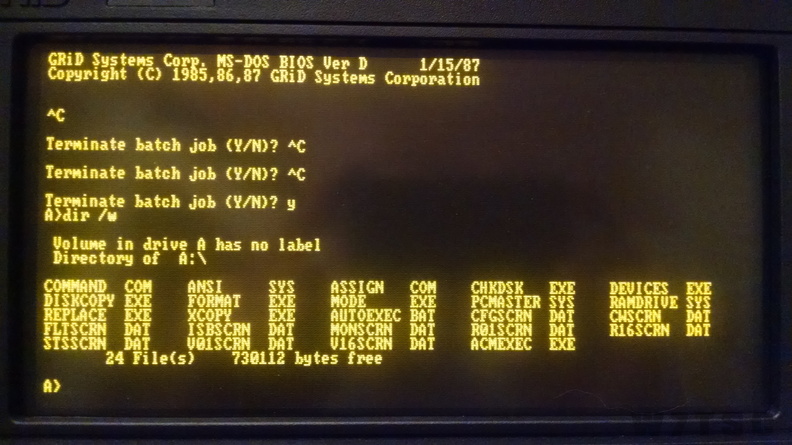
To catch the autoexec running, you must wait for the GRiD DOS boot splash and then begin rapidly pressing [Ctrl]+[C] which should catch the autoexec as it runs and drop you to a prompt asking if you want to terminate the batch job. Answer by pressing [y] and then [Return].
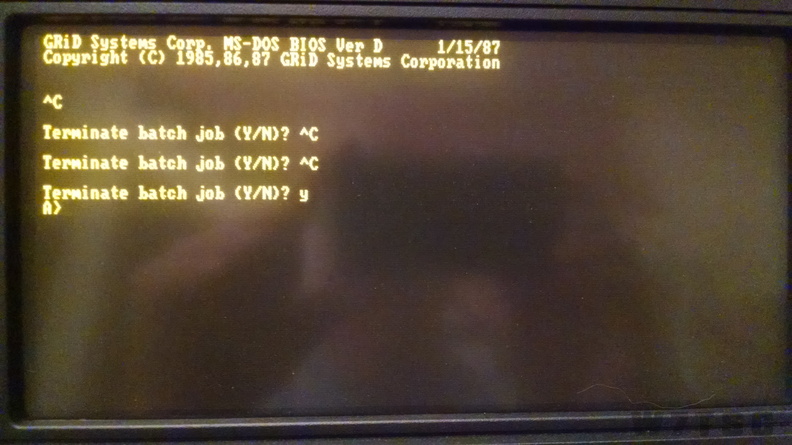
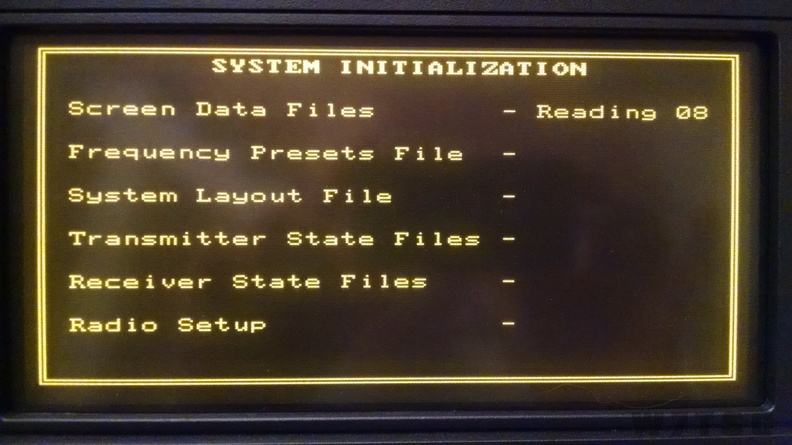
If you miss interrupting the autoexec process, the radio program will start the System Initialization and you'll have to press [Ctrl]+[Alt]+[Del] to try again.
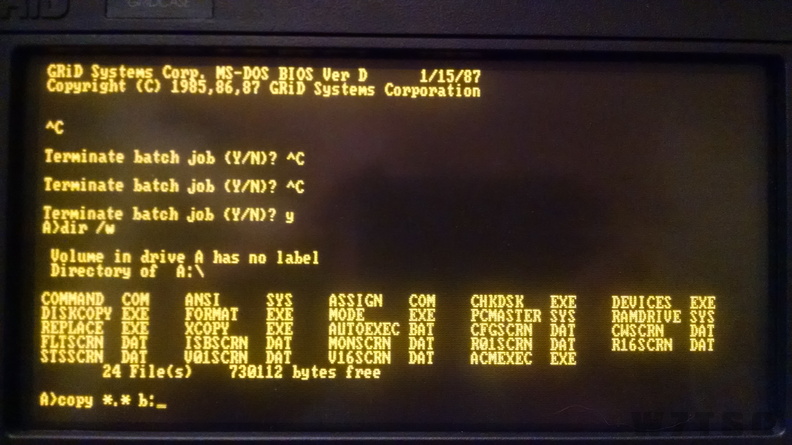
Once the autoexec is interrupted, the operating system will drop to an A: prompt which is typically the floppy. When boot without a floppy disk in the drive, the ROM considers itself the A: drive. Even if a floppy is inserted as we have now, the operating system treats both it and the ROM as the A: drive. Typing "dir" and pressing [Return] will list both the files from the ROM and any files from the floppy. In this case we have a freshly formatted floppy disk inserted so there are no files on it; therefore the listing shown here contains all the files on the ROM.
When a DOS system only has one floppy drive, it can address that floppy drive as either A: or B: so that files can actually be transferred from one floppy disk to another by swapping them back and forth in the same drive. We are going to use that same principle here to copy the files from the ROM to the floppy by typing "copy *.* b:" at the command prompt and pressing [Return].
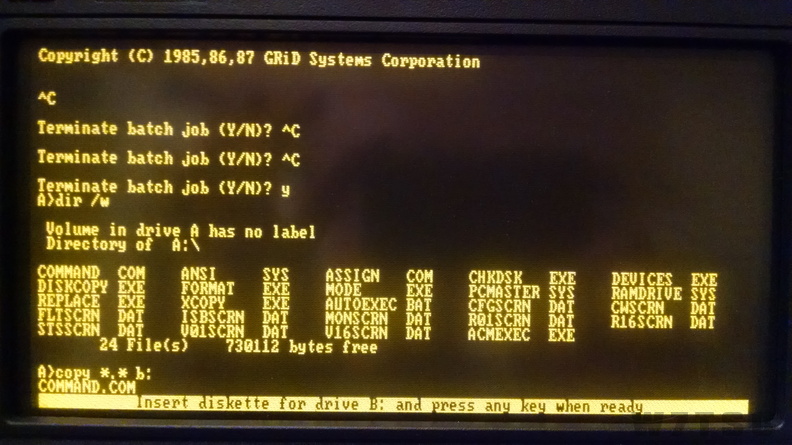
In this next photo the system has buffered COMMAND.COM for writing to the B: drive and has prompted the user to swap the target B: floppy into the drive. DO NOT SWAP THE FLOPPY. Although you -could- swap in another floppy, the fact is the system will treat whatever is in the drive as the B: floppy. Since we have a freshly formatted floppy already installed, just press [Return].
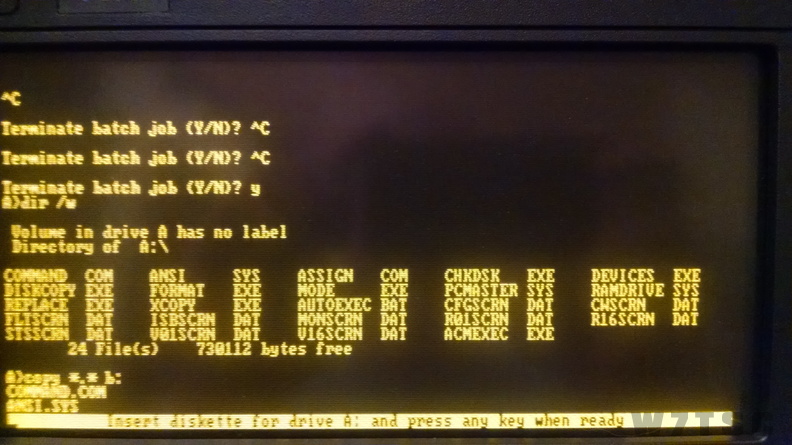
Once the system has copied the file to the B: floppy, it will then ask to swap back to the A: floppy, but it is unnecessary to actually do any swapping. All the A: drive files are actually in ROM so just press [Return] and it will move on to the next file. Repeat this sequence for each file, leaving the same floppy in the drive and just pressing [Return] each time the system prompts for a floppy swap.
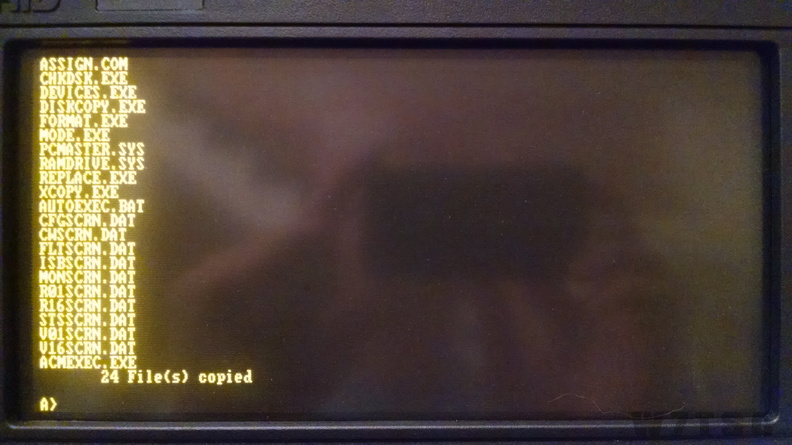
Once finished, the system summarizes how many files were copied. In this case, there were 24 files in the ROM and they have all been copied to the floppy disk. Now we can eject the floppy disk and shutdown the GRiD laptop.
The contents of the ROM should now be on the 720K floppy diskette. The next step is to copy those files onto the hard drive of another computer. With most computers no longer having a floppy drive, it may be necessary to obtain an external floppy disk drive. The next article in this series will explore how to get the files from the floppy to a hard drive and how to run the application from there.