In the previous article "Running GRiD ROM Files from a Hard Drive" we took the files we extracted from the GRiD laptop to a Floppy Diskette and moved them to a Hard Drive on a modern computer. In that article we also saw how to run the ACMEXEC application by substituting A: drive for the drive\directory location of the files. The only thing it couldn't do at the time was talk to COM1. This article will explore how we can get the application to see COM1 and pass it's data out the USB port converting it to RS232C serial compatible with the 25-pin D-SUB serial connector in the AN/TSC-60(V)9 HF Communications facility.
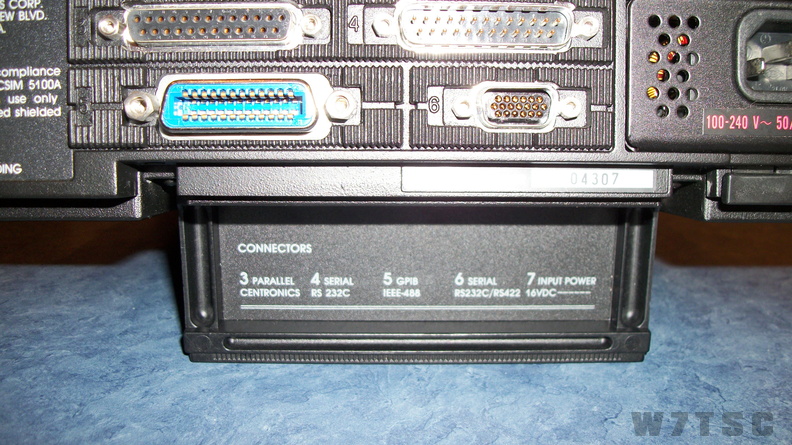
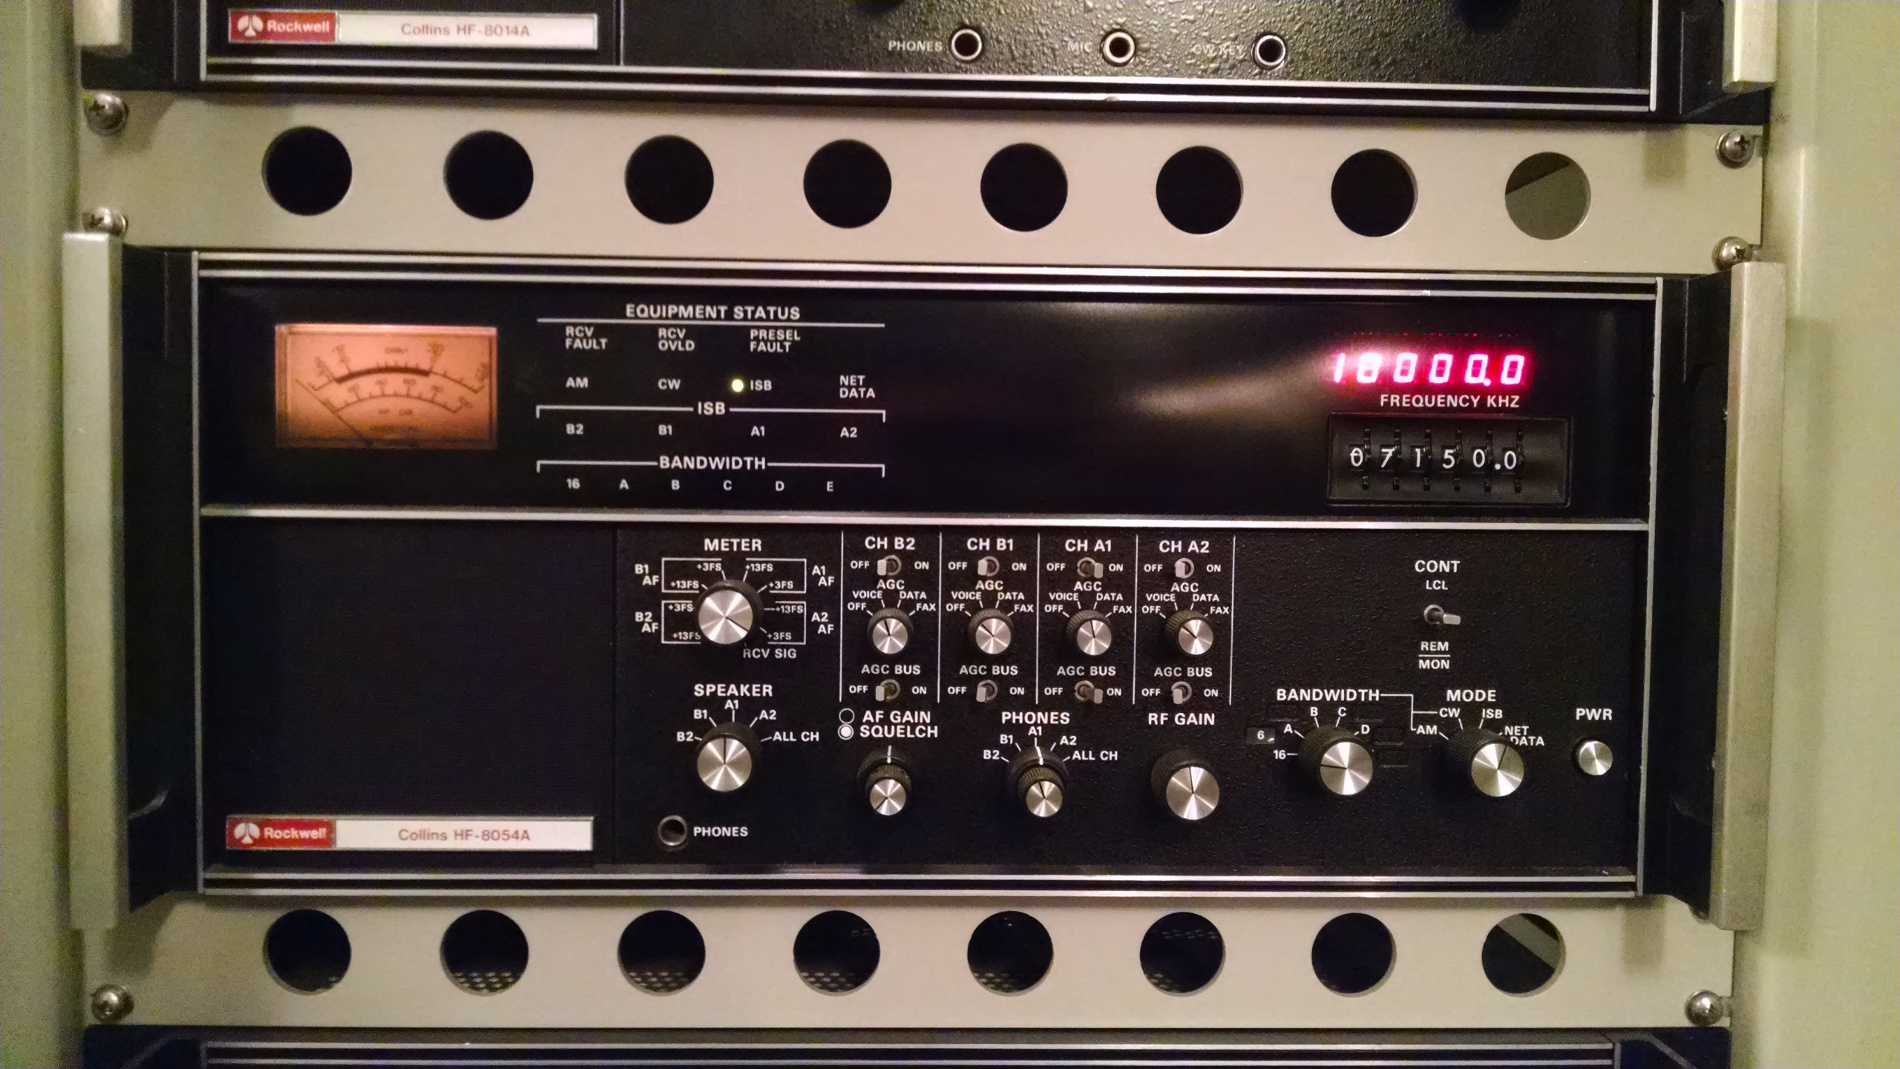
In the perfect world, the ACMEXEC wants to see a 25-in RS232C serial COM port on the back of the GRiD laptop as seen in this photo, upper right, connection number 4.
Although serial ports appear to have gone the way of most extinct animals, there are in fact a few computer manufacturers who still supply 9-pin serial ports. To my knowledge many Panasonic ToughBook laptops, ToughPad tablets and some Dell laptops (probably the rugged line) can be ordered with a 9-pin serial port. However most modern laptops only come with USB ports.
If a person has a desktop computer, they can order a serial port adaptor to plug into an available card slot on the motherboard, though 25-pin serial cards are becoming more difficult to find. For our purposes we could either try to find a suitable laptop with a 25-pin serial port (unlikely) or build a desktop system with a serial card. Or, since I want to keep the computer footprint small inside the facility, I could try using a USB-to-Serial adapter cable and Virtual Serial Port drivers. If I could make it work, not only would it help me, but it would also help any others who wished to run similar GRiD software on modern computers, but didn't want to try and find something with an old 25-pin serial port. I was successful in this endeavor; this article will outline how it's done.
How to make USB look like RS232C Serial
At this point in my efforts to make the ACMEXEC application work from a modern computer to the system in the TSC-60(V)9, I had two problems left to overcome; how to get serial RS232C out a USB port and hooked to a 25-pin serial cable, and how to make that port look like COM1. I took each of these in turn, but ended up having to solve them both simultaneously. The first thing to do was get the hardware to make USB look like serial.
About five years ago a friend gave me a Garmin GPS III Plus. It has a connector on the back with four pins; power, ground, serial transmit and serial receive. I could get a cable for it, but it terminated in a 9-pin serial connector, which none of my normal use computes had, and my single laptop with a 9-pin serial port was woefully inadequate to run the necessary software to talk to the Garmin. I had no choice but to research USB-to-Serial adapters.
In my work with hardware and software products, I had become familiar with the FTDI chipset and how it works with USB and serial communications. I went to Amazon.com and did a search for USB-to-Serial cables and found plenty to choose from. I selected one which claimed to use the FTDI chipset and therefore would use the FTDI drivers.
This is the cable I selected:
http://www.amazon.com/gp/product/B003N9TYW0?psc=1&redirect=true&ref_=oh_aui_detailpage_o00_s01
When I first received it and plugged it into my 64-bit Microsoft Windows desktop computer, it was immediately recognized and downloaded the appropriate drivers from the Internet. However, if a computer isn't hooked to the internet, a person might need the right drivers to install on their own.
I know from experience that what I need to do is make the USB port look like a serial port; in other words, it needs to be a Virtual COM port.
FTDI maintains their own web site where you can download the latest Virtual COM Port (VCP) drivers:
http://www.ftdichip.com/Drivers/VCP.htm
The same driver package is used for both 32-bit and 64-bit Windows systems. At some point in the future (another article perhaps) I will explore running the same ACM Executive on a Linux based computer. For now, grab a copy of the VCP drivers and save them to a safe place. After obtaining the cable, you are ready for the next steps.
This article won't step through how to install the VCP drivers or the USB-to-serial cable. Plugging the cable into your Windows-based computer should trigger it to find the right drivers. If it doesn't, then you will need to point the driver installation dialog to the VCP drivers you downloaded earlier.
With the cable and drivers installed, it's time to see what COM port it was assigned.
The ACMEXEC application wants to talk to COM1, and there is no setting that I was able to find to change it. The application was designed to run on a GRiD laptop computer, and although the GRiD has more than one serial port, the one needed for the TSC-60(V)9 is addressed as COM1. On our modern computer, we need to make our USB-to-Serial cable appear to be COM1.
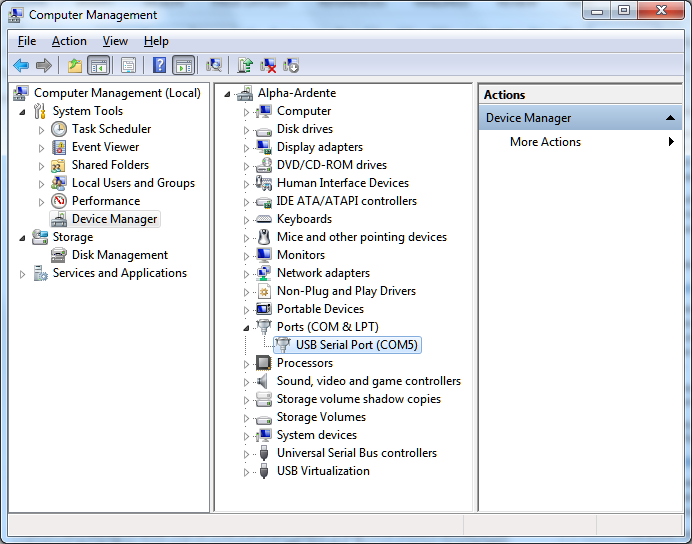
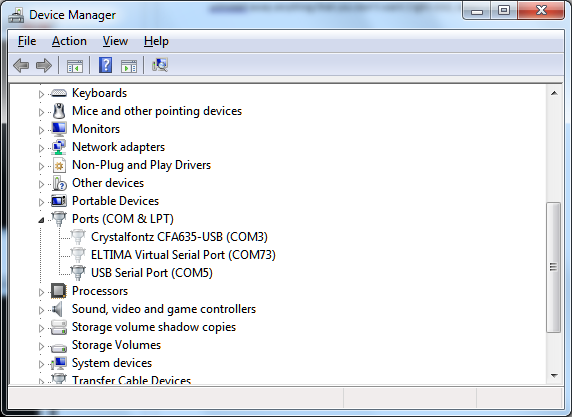
In this example, from my 64-bit computer, the USB-to-Serial cable shows up in the Device Manager as COM5.
This means if I try to run the ACM application it won't find the COM port and will fail to control the radios. I had to find a way to change the COM port. It turns out there is a way to do that. Searching the Internet I found a page that helped me understand what to do:
http://plugable.com/2011/07/04/how-to-change-the-com-port-for-a-usb-serial-adapter-on-windows-7
This was a good start. However, you might find the COM port you want to use is unavailable or is already assigned to some other device, even if it's not currently plugged in. Reading in the comments section of the aforementioned web site I found someone who showed how to turn on all registered COM ports so you could see what the operating system had previously assigned even if they weren't currently showing up. By making them all visible, it would allow you to remove those assignments you might not be using anymore.
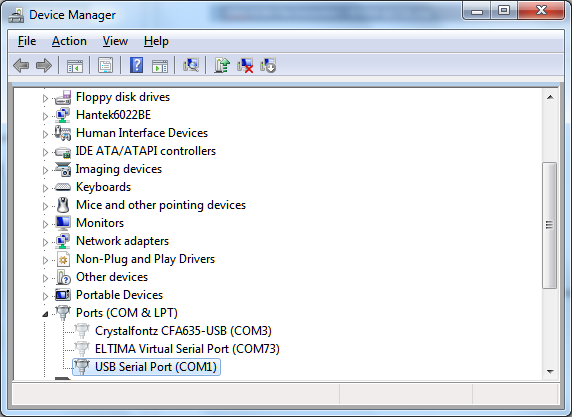
At first thought, you might think that going into the Device Manager and clicking on the View menu and selecting Show hidden devices would do the same thing, but it doesn't. For example, on my 64-bit Windows 7 computer, the previous screenshot shows the Device Manager listing for COM ports when my FTDI USB-to-Serial cable is plugged in. Let's see what's there if I enable non-present devices with the following procedure.
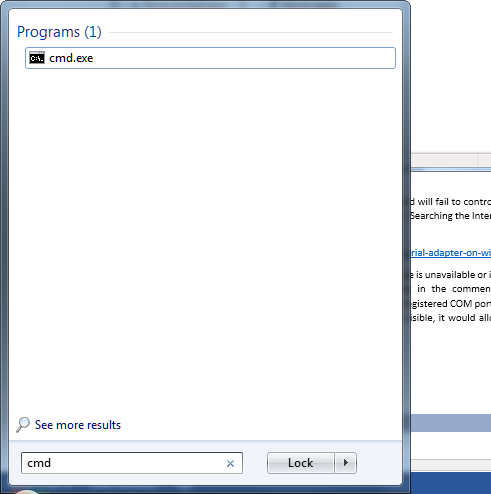
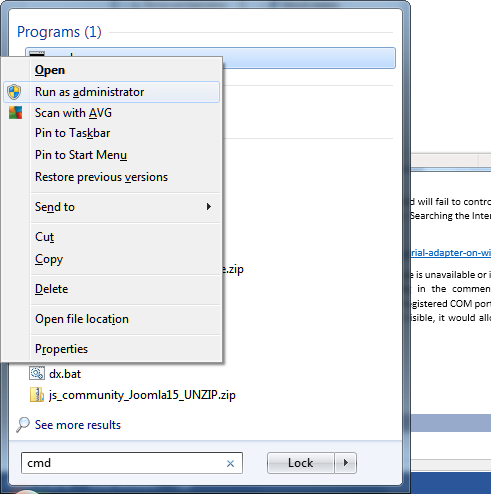
First we need to open a Command prompt window as an Administrator. The easiest way to do this is to click on the Start menu and type "cmd" in the Search box but DO NOT press [Enter], instead, wait for cmd.exe to pop up at the top of the menu, then right-click and select "Run as Administrator."
You will have to answer [Yes] to the User Account Control that pops up, then a new Command prompt window with elevated right will open up.
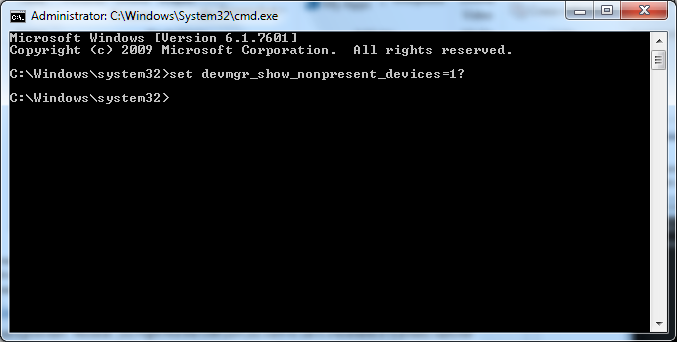
At the prompt, type "set devmgr_show_nonpresent_devices=1?" and press [Enter]
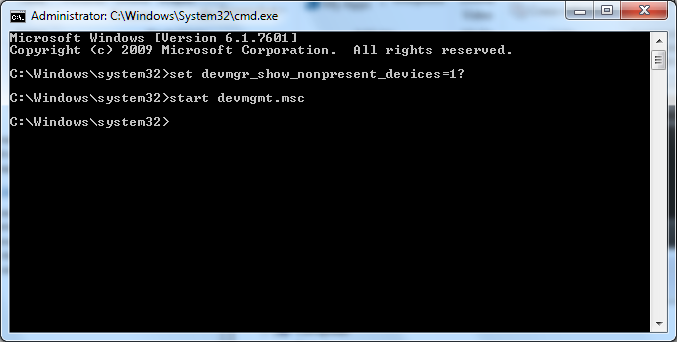
Next, enter "start devmgmt.msc" and press [Enter]
A new Device Manager window will automatically open. From the View menu, select "Show hidden devices."
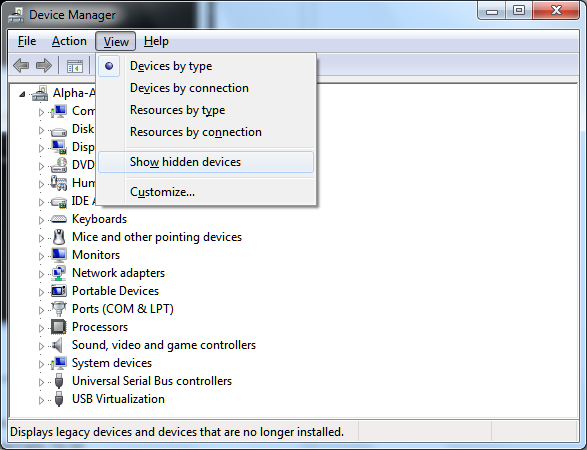
Now if you expand the section on COM ports, all the COM ports that have ever been attached are listed. You'll note that some are grayed out, these are not currently plugged in or being used. In my case, you can see COM3 was assigned to a Crystalfontz display and COM73 is for a Hardware Virtual Serial Port used with AGW Express, an Amateur radio application used with packet radio. Since there is no COM1 that has ever been assigned to anything, it should be easy for me to assign the USB Serial Port (COM5) to actually be COM1. Note: If you had a COM1 that was assigned to something you no longer used, you can delete that device, or reassign it to another unused port.
Even though I can't easily take this desktop computer out to the TSC-60 facility, I'll show how to reassign COM5 to be COM1. This is the same process I used on my 32-bit computer to reassign the USB-to-Serial cable to COM1.
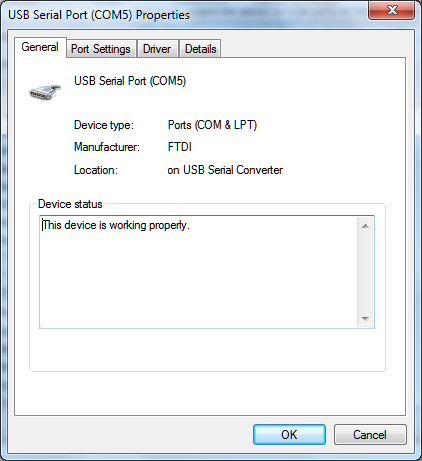
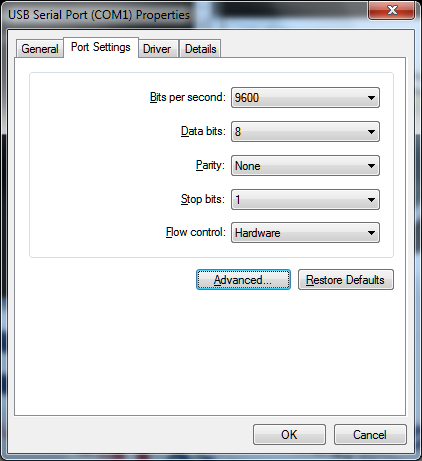
From the Device Manager, double-click on the COM port you want to change, or right-click and select Properties. Once the dialog box comes up, click on the Port Settings tab.
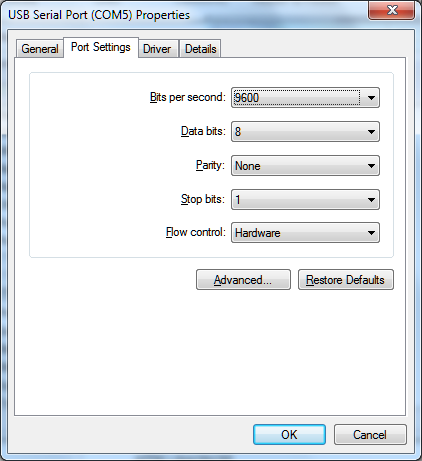
From the Port Settings tab, click on the button labeled [Advanced…] to open up more options.
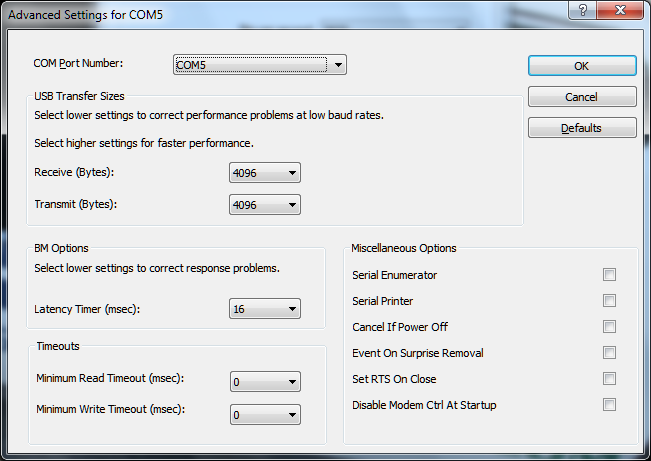
Click on the drop-down arrow for COM Port Number: and select COM1. You may need to scroll the list up a little to see the top.
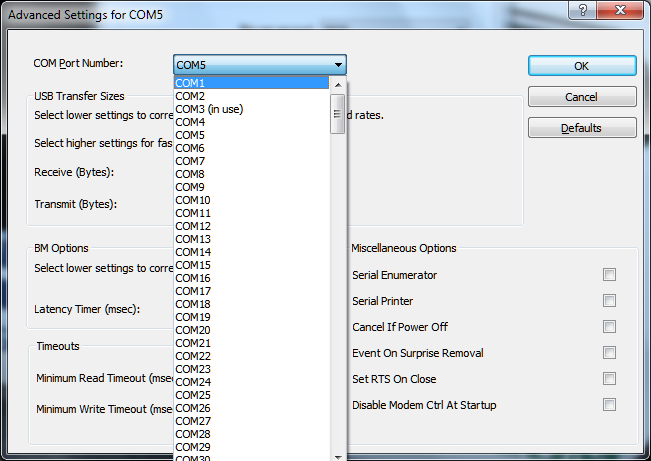
After Selecting COM1 you can leave all the other settings alone and click [OK].

The Advanced dialog will close and the original Properties dialog should now have changed to indicate COM1 in the title bar of the dialog window.
Although the radios in the TSC-60(V)9 facility operate at 2400 baud, I discovered it's not necessary to change the settings in the Windows operating system. When running the ACMEXEC file, it apparently sets the COM port to the appropriate baud rate. I tested this using an oscilloscope to compare to the actual GRiD laptop (another separate article).
It is now safe to close this dialog with the [OK] button as well as the Command prompt window previously opened. The Device Manager dialog should also now show the USB-to-Serial port as COM1.
Performing this same work on my 32-bit laptop, I first deleted a prior COM1 device and then reassigned the FTDI USB-to-Serial converter to COM1. Now when I started the ACM application on my 32-bit laptop I no longer got the COM1 error.
There was just one thing left to do. The USB-to-Serial cable terminated in a 9-pin connector, but the facility terminated in a 25-pin. I needed an adapter to go from 9-pin to 25-pin. What I was looking for was a simple small adapter.
Unfortunately, all mine were the wrong sex; I needed a female 9-pin and male 25-pin. A search on Amazon.com will lead to several potential options (one shown here).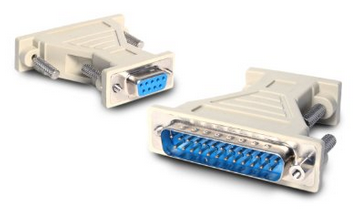
In my case, I had an old 9-pin to 25-pin serial cable once used with a US Robotics 56K modem. It may have been a little long, but it worked just fine.
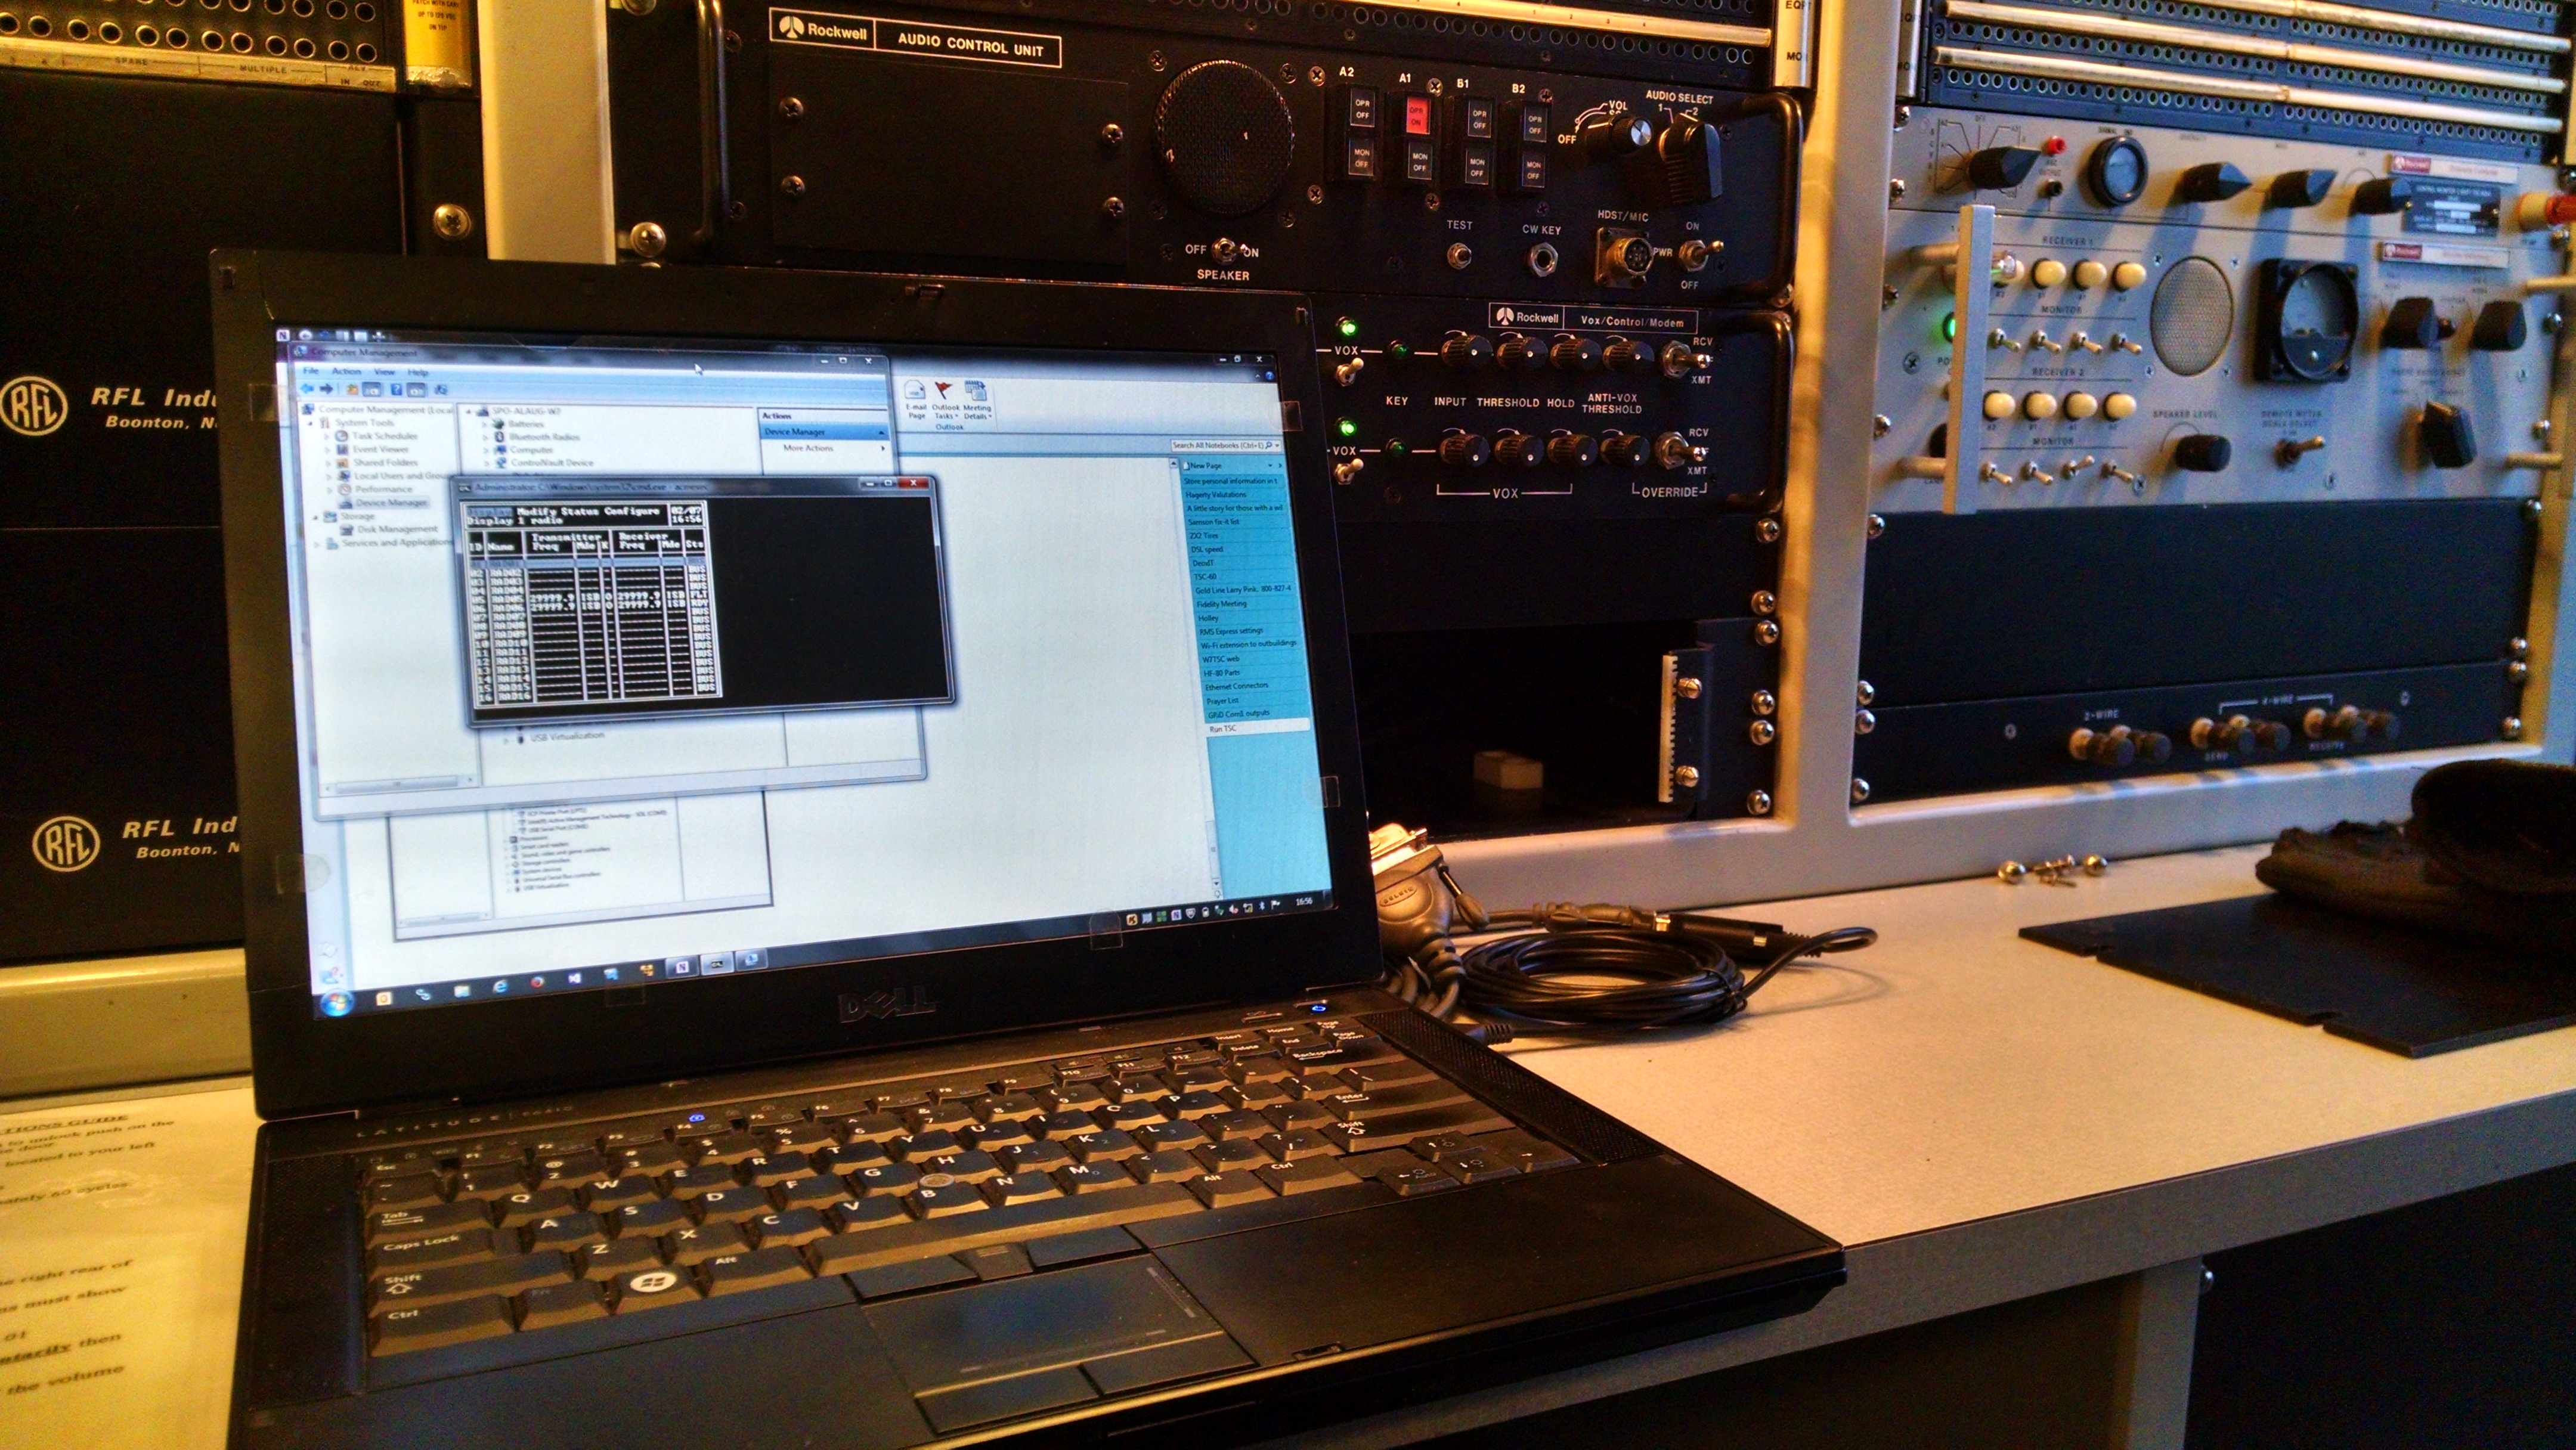
I assembled my 32-bit laptop, along with the FTDI USB-to-Serial cable and my 9-pin to 25-pin serial adapter cable and headed out to the facility. After plugging in the adapter cable to the facility serial port where the GRiD laptop normally plugs in, I turned on all the radio equipment and started the ACMEXEC application on my 32-bit Windows 7 laptop. Remember from the previous article I was substituting A: for C:\TSC using the DOS SUBST command in order for the application to think it was in the A: drive.
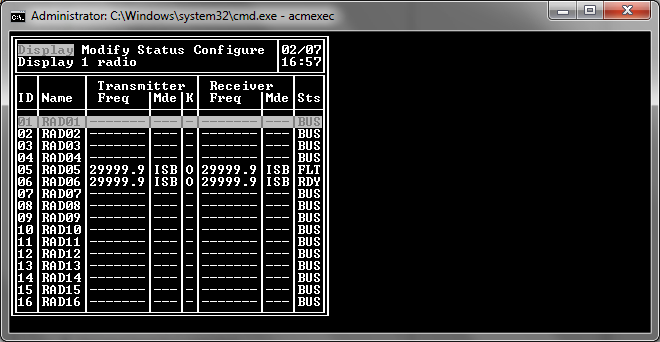
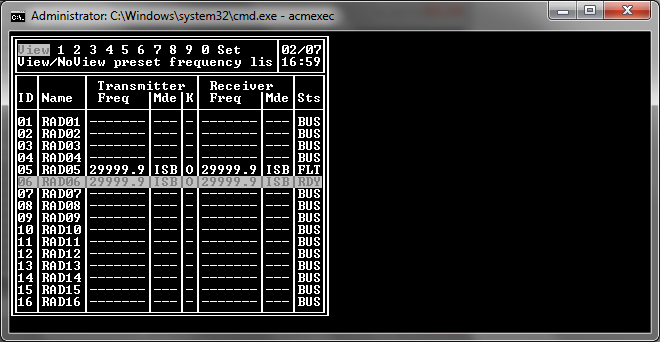
From the previous screenshot, you can see the ACM has recognized two radios on the system; RAD05 and RAD06. One of them has a fault in the radio (that I need to fix), but the other is in a Ready state (RDY). To make sure the control program can actually send commands and they are recognized by the radio, we'll perform a frequency change on the RAD06 receiver.
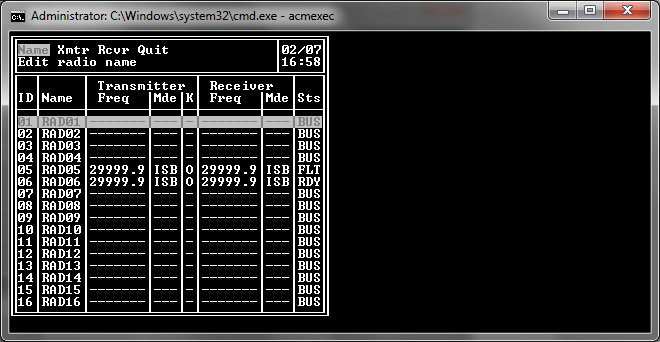
First we want to change to the Modify Menu, to do so we simply arrow over to "Modify" and press [Enter].

Here is the Modify screen.
Next we want to modify the receiver so we arrow over to the "Rcvr" menu item and press [Enter]
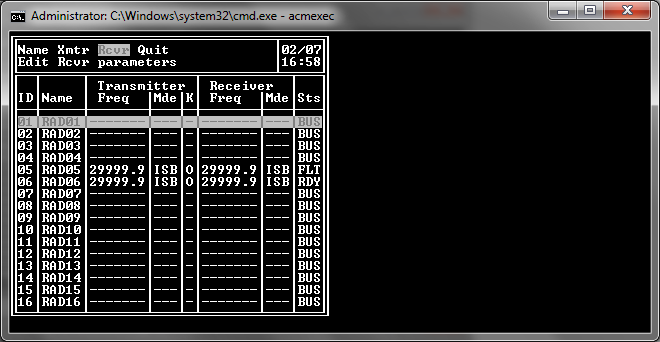
This is the modify receiver menu.
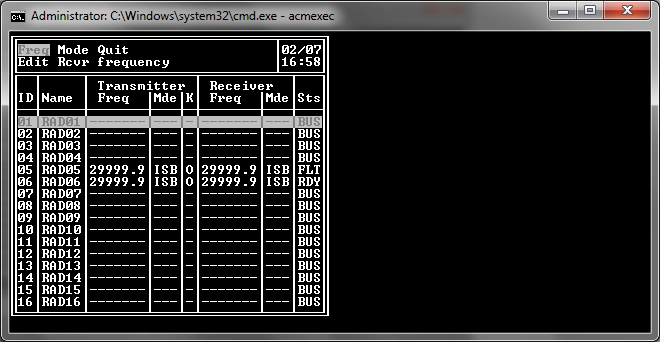
Next we want to modify the frequency. The default selection is already on "Freq" so we don't need to move it any; however, we do want to modify RAD06 so we need to arrow down the list to select RAD06 before we press [Enter].
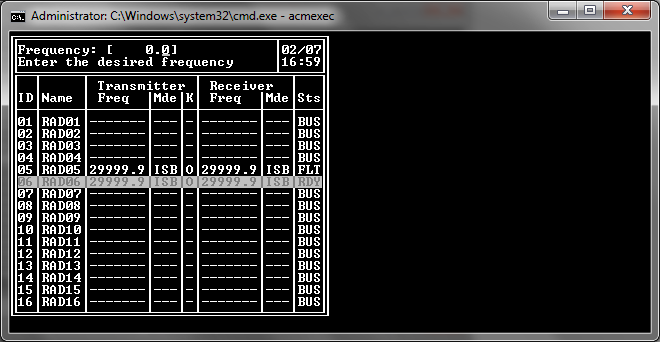
Once on the modify receiver frequency screen, we want to set a specific frequency. The numbers 1 through 9 indicate pre-saved frequency settings; those that might typically be saved to a floppy disk as part of a mission configuration. We just need to arrow over to the "Set" option and then press [Enter].

Once we enter the set frequency screen, it allows us to enter the frequency in Khz.
We'll just do a quick change to 10Mhz and see if it takes.
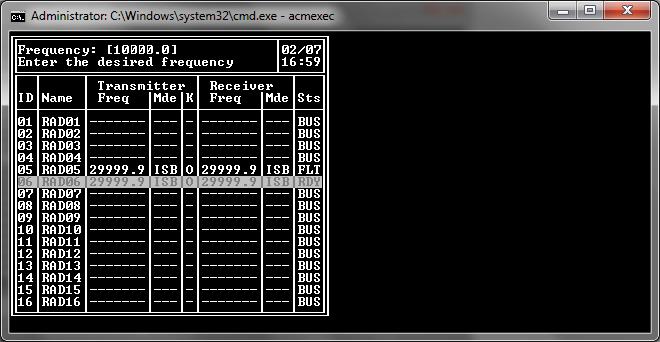
Once the frequency is input, we press [Enter] to send the command to the radios.
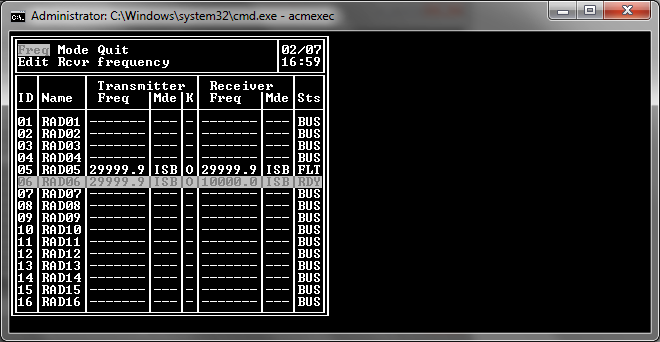
In the above screenshot you can see that RAD06 has changed Receiver frequency to 10Mhz. Here is the same screen with the radio ID cursor moved out of the way so we can see it better.

This showed me that the HF-80 radios, installed to the AN-TSC-60(V)9 facility could be remotely controlled by a modern day computer, with the ACMEXEC application running in a substituted A: drive and using a USB-to-Serial cable and appropriate adapter to mate with the 25-pin connector.
Success!
The final proof will of course come when I have fixed the faulted radios, installed some antennas and actually performed radio operations using the modern computer. However, a quick look at the radio rack in the facility showed the receiver had indeed changed to 10Mhz.
The final installment for this series of articles will see if we can get the same thing working on a 64-bit system using DOSBox, and a reassigned COM port through the same USB-to-Serial cable and adapter. If we are successful, then it should prove the system can be run with nearly any modern day laptop or desktop computer. Stay tuned for the next exciting episode.
Microsoft and Windows are either registered trademarks or trademarks of Microsoft Corporation in the United States and/or other countries.