In the previous article "GRiD ROM File Extraction" we copied all the files from the ROM of our GRiD laptop used with an AN/TSC-60(V)9 HF Communications facility, to a 720K 3½" Floppy Diskette. This article will now explore how to put those files onto a modern computer and run the ACMEXEC application from a Hard Drive.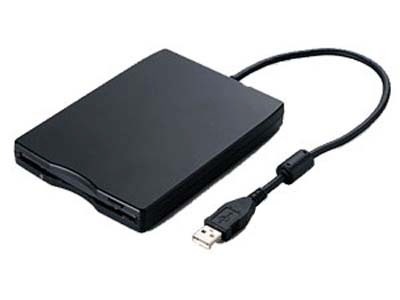
From Floppy to Hard Drive
Most modern computers, laptops and desktops, don't contain a floppy drive slot anymore. Floppies began disappearing from computers in the late 1990's. However, many old geeks still have some floppies lying around and they still need to work with them occasionally. To do this on a modern computer with no internal floppy drive, we need to obtain an external USB Floppy drive such as the one pictured here. Check Amazon.com for options.
Plugging this drive into an available USB port will typically trigger the installation of appropriate drivers and then should appear in your file manager as "Floppy Disk Drive (A:)." Our system is a Microsoft Windows 7 64-bit desktop computer.

Inserting the floppy we created in the last article, into the drive now reveals the files on the floppy.
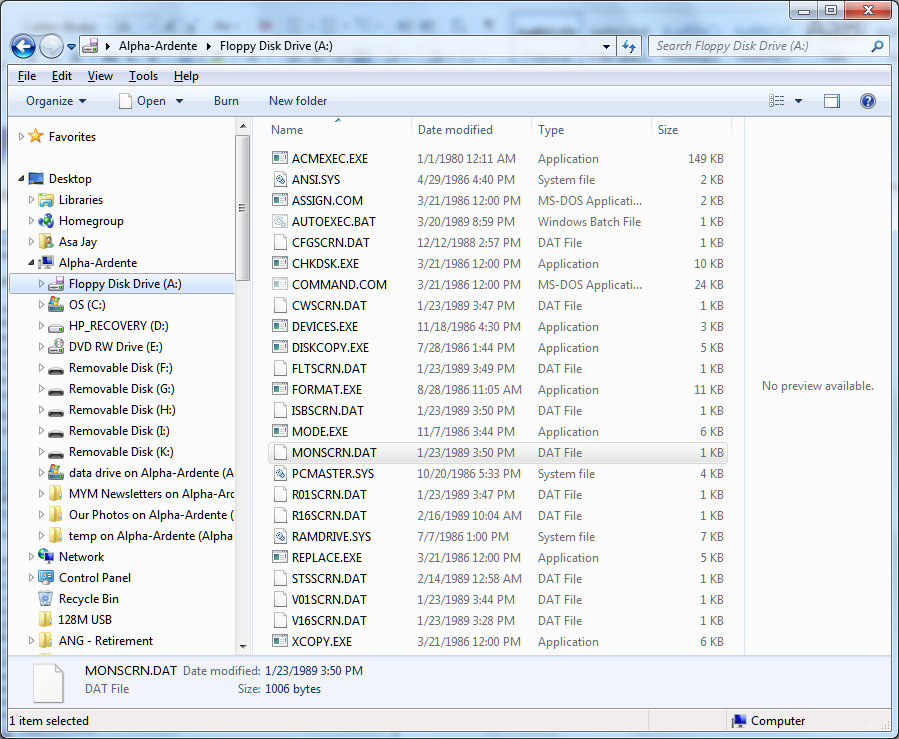
It now becomes a simple matter of Drag and Drop (Copy & Paste) to move the files from the floppy to the Hard Drive. In this case I created a directory right off the root of the C: drive called C:\TSC and placed all 24 files into that directory. Once successfully copied, we can eject the floppy disk and unplug the drive. I strongly recommend making a backup copy of the entire directory to some other location, including a location not on the same computer. A USB thumb drive can now be used to transfer these same files somewhere else.
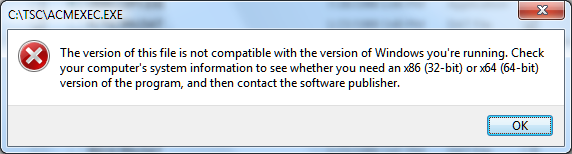
With the files now on my Hard Drive, I wanted to "test" the program by simply double-clicking the ACMEXEC.EXE application file name in the File explorer. Unfortunately, it's not compatible with a 64-bit system.
At this point I had two options, I could either move to a 32-bit computer which I have readily available, or try using DOSBox on my 64-bit machine. My initial testing was done by moving the files to my 32-bit computer using a USB thumb drive. However, I later found the same could be accomplished using DOSBox on my 64-bit computer, which we'll explore in a later article. For now, we'll look at what was necessary on the 32-bit system.
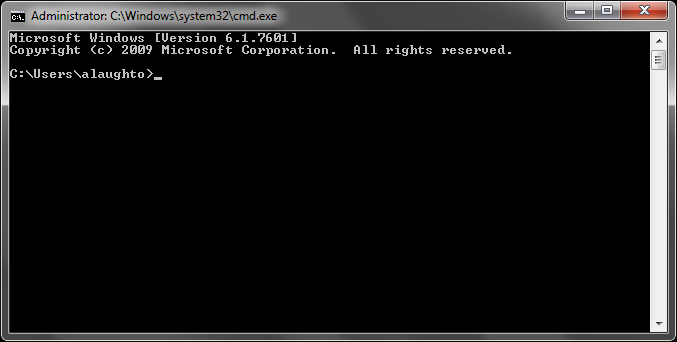
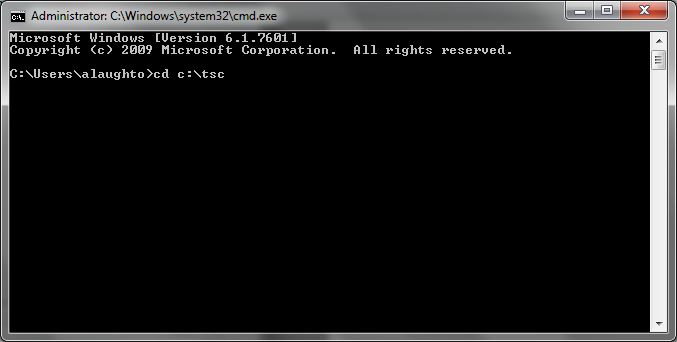
Having copied the files to a C:\TSC directory on my 32-bit laptop, I opened a regular command prompt by going to the start menu and typing "cmd" in the Run box.
Move into the TSC directory by typing "cd c:\tsc" and pressing [Enter].
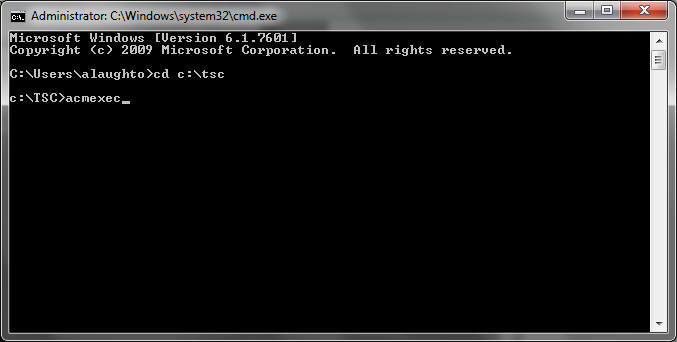
Once in the TSC directory, type "acmexec" and press [Enter].
When the ACM tried to start, it apparently looks for COM1 to control the radios. If there isn't a COM1 port to be found, it throws an error.
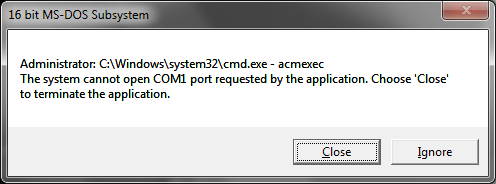
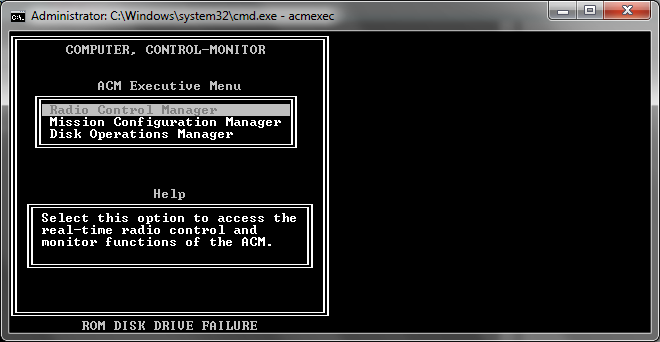
I don't have radios connected and there isn't a COM1 defined on this computer at the moment so I just click [Ignore] to keep going. Unfortunately, this is where I ran into the first real problem. The program is looking for the ROM drive or something on the ROM drive and can't find it. Because the Radio Control Manager can't find what its looking for, it exits to the ACM Executive Menu and displays the error at the bottom of the screen.
Through an extensive investigation and help from friends, I discovered the ACMEXEC executable is looking for specific files to be located on the ROM, or as you might recall, the A: drive since the ROM is addressed on the GRiD laptop as A: drive. To test this theory, I took the floppy I had created earlier and put it in an old laptop that still had a floppy drive and the ACMEXEC started right up and brought me to the radio control screens. The floppy is considered the A: on that system so the program was happy.
I then created a bootable Compact Disk (CD) with the TSC files and boot it on my modern 64-bit computer and it also worked fine. When booting from a CD, it will look like A: drive to the operating system. But having to boot from floppy or CD just to run the application, though it appeared to work, was not the optimal solution for me.
Needing help at this point, I contacted a software engineering friend who provided some insight into what to look for in the hex code. Since the application is pretty small compared to today's applications, I thought it might be an easy task. However, the recommendation to find any A: references in the code didn't pan out; there were only a couple and changing them didn't make a difference. Therefore I took a step back and considered other options.
How to make C:\TSC look like A: drive
The answer actually came to me from running DOSBox on my 64-bit computer. DOSBox is an x86 emulator that I installed to run some old games from the 1990's. Before you can have DOSBox address any programs, it needs to know where they are, and to do that you must "mount" a new drive letter for the drive and directory you want to use. That triggered my old DOS brain cells to recall the SUBST command.
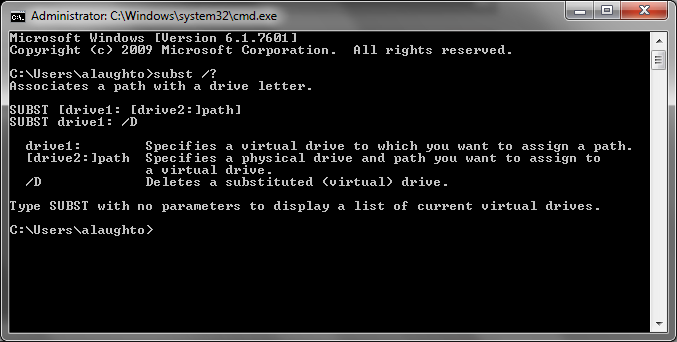
The SUBST command is an old DOS command to substitute one drive letter for another or for a drive\directory in order to make program paths smaller or more accessible. Even today's modern Microsoft Windows operating systems still contain many of these older DOS commands. To see for yourself, open a Command prompt window by clicking on the Start menu button and typing "cmd" in the run box and pressing {Enter]. Next, at the command prompt, type "subst /?" and you should see something similar to the next screenshot.
The SUBST command takes two variables; the drive letter you want to use, and the drive\path it points to. In my case it was a simple job to point A: drive to C:\TSC by typing "subst a: c:\tsc" and pressing [Enter]. Then change to the A: drive by typing "a:" and pressing [Enter].
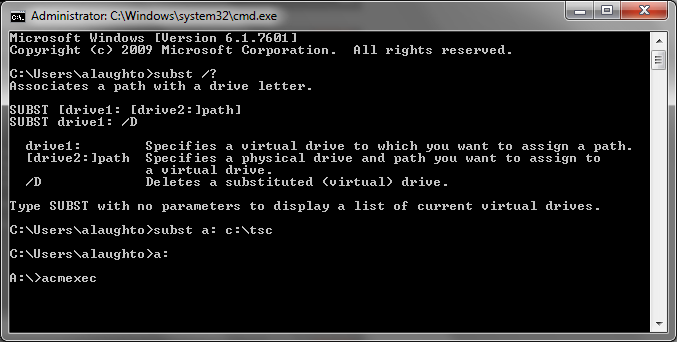
Finally as illustrated above, we type "acmexec" at the prompt and see what happens…
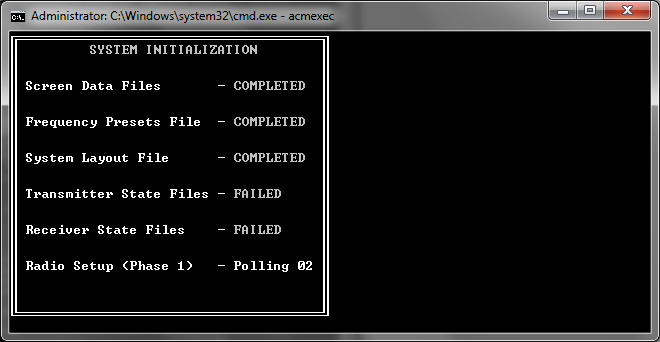
This looks promising. After I Ignore the COM port failure, the program is actually initializing the system rather than immediately failing to the ACM Executive Menu. After a minute or two of attempting to talk to the non-existent radios, the system initialization completes and drops us to the radio control screen without any errors.

We have now successfully -run- the ACMEXEC radio control application on a Windows 7 32-bit computer from the hard drive; without using a floppy disk. However, there are a few steps to get us there:
- Open a command prompt window
- Substitute the drive
- Change to the drive
- Run the program
How to reduce the amount of typing and mouse clicks
All those steps seem like a lot to go through just to run the radio program on a different computer; after all, the GRiD just starts up and falls right into the radio control application. Fortunately, batch files still work with modern computers and operating systems.
In this case, I created two batch files; one to substitute the drive and start the application, and one to un-substitute the drive after I was done. Since the ACM doesn't have a way to exit the program, there's no way to return to the same batch file for continued processing.
You can use any plain text editor, such as Microsoft Notepad, in order to create the batch file. Batch files consist of simple commands and are saved with a .BAT extension.
The first batch file we'll look at is what I named the TSC.BAT and contains three lines which automatically perform the drive substitution, change to the drive and run the ACM program.
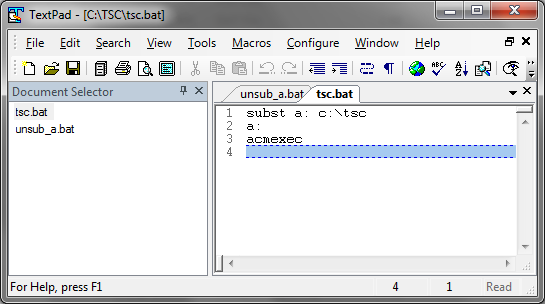
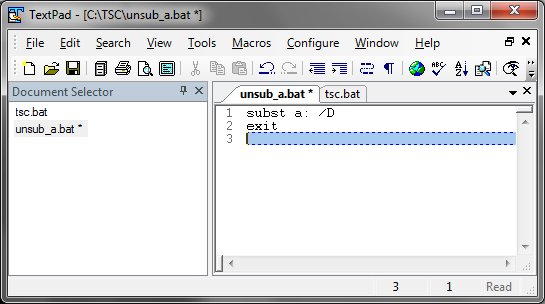
The other file I named UNSUB_A.BAT is used to un-substitute the A: drive by using the "subst a: /D" command and then exiting.
These batch files can be run by simply double-clicking on them. The TSC.BAT gets me right into the radio control program without manually opening a command prompt window or typing different commands; it's about as easy as it can get. A person could create shortcuts on their Windows desktop for easy access or add them to the start menu somewhere. These make it quite simple to run the ACM radio control manager from a modern 32-bit computer.
This article has shown how to move the GRiD files from the floppy created in the last article, to the hard drive of a modern 32-bit computer, and how to successfully run the application by using the SUBST command in DOS. Although the software is running, it's not communicating to any radios as yet. The next article will explore how to use a USB-to-serial converter cable, virtual com port drivers and manipulating COM port assignments in order to actually talk to the radios using their native serial protocol. The final article in this series will take a closer look at how to effectively setup a 64-bit system to run the application smoothly with as few clicks and minimal typing as necessary.
Microsoft and Windows are either registered trademarks or trademarks of Microsoft Corporation in the United States and/or other countries.